Table of Contents Show
With so many bells and whistles in RVs, it’s easy to overlook or underappreciate some basic RV amenities. One of the most commonly overlooked RV amenities is a grey water tank. Being able to shower, do dishes, and wash your hands regularly is a tremendous feature when using your RV. If it weren’t for this essential water storage, you wouldn’t be able to do these activities wherever you are.
What Is a Grey Water Tank?
A grey water tank is a receptacle that’s commonly secured under an RV and collects water from the sink and shower drains. The water is mostly soapy remains from washing hands, dishes, and showering, but it will contain tiny food remnants from dishes.
How Big Is a Grey Water Tank?
The size will vary depending on the RV. Many travel trailers have grey tanks ranging from 18-40 gallons, but larger toy haulers can have tanks that hold 100+ gallons. Consult your RV’s documentation or manufacturing website for accurate information regarding your specific RV.

What Happens When Your Grey Water Tank is Full?
As a grey water tank begins to reach capacity, water will take longer to drain or not drain at all. When your tank is full, the dirty water needs someplace to go, so it will come out of the drain that’s the shortest distance from the tank.
To avoid this problem, dump your tank as soon as possible. Too many RVers have found themselves standing in dirty water while showering because they waited too long to empty the tank!
Where to Empty Your RV Grey Water Tank
While your grey water tank mostly contains soapy water, the ground is not an appropriate place to empty your tank. Grey water can contain bacteria and other chemicals that could harm plants and animals.
RV dump stations are the easiest and most sanitary places to dump grey water. You’ll most often find them at campgrounds, truck stops, sporting goods stores, marinas, and wastewater treatment plants.
How to Drain Your Grey Water Tank on Your RV
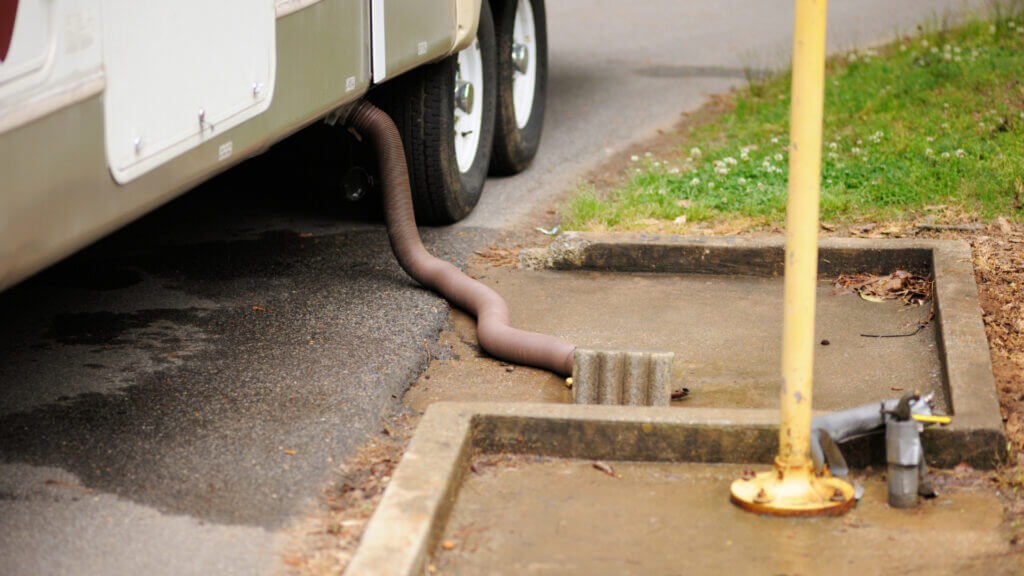
Start with the appropriate tools. You’ll need an RV sewer hose and the proper fittings to connect the hose between the RV and the dump station.
Once you have a secure hose connection, find the knobs that open the grey tank drain. They’ll either be in your under-storage bay or near where your septic hose connects to the dump station. Slowly pull the knob to open the drain while monitoring the septic hose connection points. If you see any signs of leaking, close the drain quickly, and secure your connections.
Once water is flowing into the dump station, increase the water flow by pulling the knob to open the drain fully. When complete, return tools for later use and wash your hands.

How to Clean Your Grey Water Tank
When you can smell your RV’s grey water tank, it’s time to clean it! It’s a relatively straightforward process that requires little time and effort. Typically, you’ll use a solution of four parts water and one part bleach to erase any bacteria growth.
To clarify, never use straight bleach to clean your tank! Pouring bleach directly into the tank can damage not only the receptacle but also your plumbing.
Once the freshwater tank is full, turn your faucets on one by one until you smell the bleach water from each tap. Let the cleaning solution sit in the water lines of your RV and freshwater tank overnight. The next day, flush clean water through your freshwater tank until you can’t smell the bleach solution in the water.
Preventative Maintenance to Keep Your Grey Water Tank from Smelling
Using a diluted bleach solution annually, or as smells arise, is ideal for keeping your grey water tank fresh. But there are other ways you can maintain and prevent problems there.
For example, getting a mesh drain screen can help prevent food particles from going down the drain and sitting in the tank. These particles can often stick to the tank’s sides and create a foul odor over time.
If you’d prefer not to mix your own solution, you could use a commercial cleaner like Happy Campers. Many chemicals on the market can help RVers keep all their tanks smelling fresh.
How to Keep Your Grey Water Tank from Freezing
When water freezes, it expands. Expansion in your pipes can lead to costly repairs, but it’s possible to avoid frozen grey water tanks.
Many RVs have “four-season packages” that include tank heaters, for instance. These act as heated blankets wrapped around the tanks in your RV’s underbelly. When temperatures drop, you turn on the blankets, and they keep your tanks toasty warm.
You can also prevent your tanks from freezing by placing exterior skirting around the base of your RV to block cold winds. Some RVers even choose to use space heaters or heated lamps placed near their rigs to help keep temperatures above freezing. (Just take precautions using space heaters in a confined space.)
Overall, with proper maintenance and attention, your grey water tanks can allow you to adventure for many years to come, and maintaining them is key to your comfort!
What tips do you have to maintain and keep your grey water tanks fresh?


I am developing a solution to the “crappy” gray and black tank level display. I’m replacing the resistive sensors with external glue on capacitive sensors and a circuit that interfaces them to the existing LED bar graph display. With this I expect accurate readings without the need to remove all in tank stuff that inteferes witht he OEM sensors.
I would like to find someone to produce and market the unit. Any recomendation?
I use Sealevel 2 sensors mounted on the outside of each tank .