


Table of Contents Show
Love it or hate it, technology has changed how we do many things, including camping in our RVs. Campers today come loaded with valuable gizmos and gadgets, like auto leveling, designed to make our lives easier.
However, we see owners of RVs with an auto-level system frequently asking how to use it correctly. Many wonder if they should have their slides in or out during the process.
So, which is it? Let’s jump into the discussion and see!
What Is Auto-Level?
Auto leveling is a relatively new feature that RV manufacturers install on recreational vehicles. These systems began appearing on units in the early 2000s and are now fairly common. While they’re most common on fifth wheels and motorhomes, we’re starting to see them on some travel trailers.
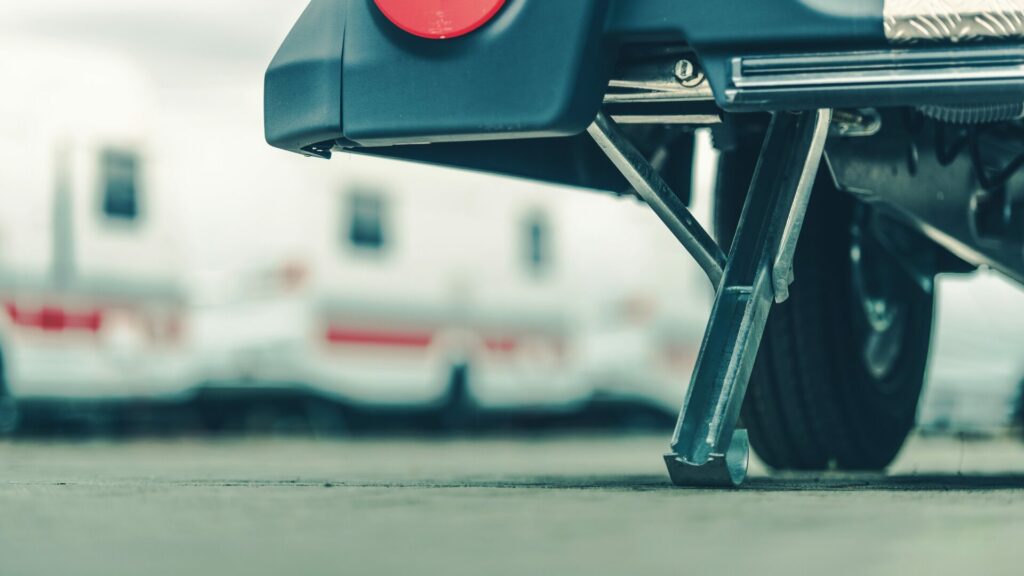
As the name indicates, these electronic or hydraulic systems can help make it easy to get your camper level. They typically involve a series of jacks that raise and lower to find the sweet spot for your rig. This helps avoid feeling like you’re walking up a hill inside your camper. If you’ve ever tried sleeping in an unlevel camper, you’ll instantly love these devices.
How Does Auto-Leveling Work on an RV?
The most common types of auto-leveling systems use hydraulics or electric motors. Combined with several sensors and motors, these devices make the necessary adjustments to get your rig level.
Once you activate the system, jacks around your trailer will lower to the ground. After all the feet are down, it will typically level your camper front to back. It will then focus on making the necessary adjustments to get your rig level from left to right. When satisfied, most systems will fine-tune everything to get it as level as possible.
Some systems will include additional jacks that provide stabilization. While they look similar to the leveling jacks, their primary purpose is to increase support. They help eliminate the bounce and movement you feel when moving around inside.
Can You Add Auto-Leveling to an RV?
Unfortunately, not every RV you see at a dealership will come with auto leveling. Just because your camper didn’t come with auto leveling doesn’t mean you can’t add it later. Is it easy? Absolutely not, but adding these systems to many campers is possible.
Lippert is a massive RV component supplier that makes various items, including RV leveling system kits. Unfortunately, this isn’t a project that the average DIYer should be attempting. Installing these systems requires specific tools and knowledge, so you’ll likely need to hire a professional.
Can You Auto-Level Your RV with the Slides Out?
One of the many debates in the RV community is that you should never level your RV with the slides out. Some do and say they’ve never experienced a problem. So which side is right?
Most manufacturers recommend only opening your slides when your camper is level. Doing so can cause binding and potentially damaging issues for you and your camper. While you may not notice it initially, these damages often eventually appear. They may present themselves as increased wear and tear and replacing parts earlier than expected.
Unfortunately, some dealerships are responsible for adding to the confusion. We’ve seen many campers on dealership lots with their slides open despite being incredibly unlevel. Remember, these businesses and their sales teams won’t be footing the repair bill.
You should think twice about using auto level with your RV slides out. There’s a difference between fine-tuning and initial leveling. Many users adjust their rigs after a few days of being in the same spot. This helps correct the settling that often occurs. However, we don’t recommend extending your slides during the initial leveling process.
How to Properly Auto-Level Your RV
Just like the order of operations you learned in math, the order in which you do things when leveling your RV is essential. Here are the steps that we’ve used and that you can use to auto-level your RV.
Back into Your Site
The first step of the process is to back into your site (or pull through if you’re lucky). Make sure you consider the distance to the utility pole or how you can maximize the use of your site. You should back up as far as possible to have room to get your tow vehicle in and out.
Remember to consider your slides during this step of the process. Some slides can stick out a few feet from the side of your camper. The last thing you want to do is open them into a utility pole or tree. This can cause serious cosmetic, structural, and equipment damage. This simple mistake can easily cost you thousands of dollars.
Get RV Level
Even if your RV has an auto-leveling system, get your rig as level as possible. This helps avoid having your wheels come off the ground, another highly debated topic in the community.
Depending on the level of the site, you may need to use boards or other leveling tools like Andersen Levelers. Using these items, you can raise the low side of your camper by several inches. While these are effective in many campsites, they may not be enough for sites with extreme issues.
Pro Tip: Check out this Review of the Best Leveling Blocks for your Camper before making your next purchase!
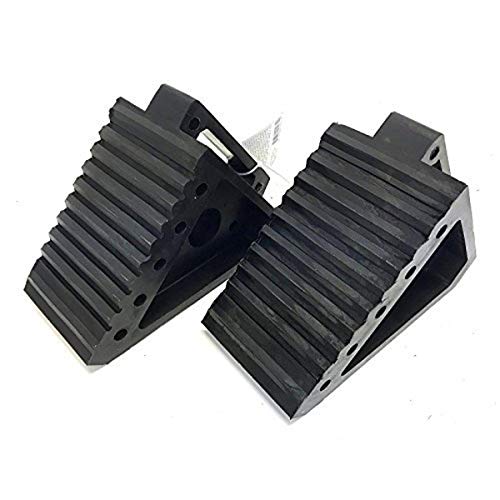
Chock the Wheels
Once you have your camper leveled, you need to chock the wheels. Trust us, this is one step you don’t want to forget. We made this mistake when we first hit the road, which almost cost us.
You can find wheel chocks at most automotive and big-box retailers. We suggest you spend a few extra bucks and get the beefy rubber versions. Do you want to trust tiny pieces of plastic to stop your RV?
When placing your chocks, put them at the front and rear of your axles. Getting them as close as possible helps prevent the chances of momentum developing and your rig rolling away from you.
- Compact Size: Measuring approximately 8 inches in length, 4 inches in width, and 5 inches in height, these wheel chocks…
- All-Weather Construction: Built for durability in any climate, these wheel chocks feature all-weather construction,…
Initiate Auto Level
Once you have leveled and chocked your RV, it’s time to initiate the auto-level sequence. This typically is very easy to do and only requires pressing a button. Some newer models with smart technologies may allow you to start the process from your cell phone. Check your owner’s manual if you’re unfamiliar with what buttons to press to get the party started.
Monitor the Progress
After initiating the auto-level sequence, you’ll want to step back and monitor the progress. Keep an eye on how far your jacks are extending. The more they extend, the more instability there will be. You can stack plastic leveling blocks or use wood squares to minimize the distance between the jacks and the ground. You may get an error if the jacks are extending too far.
While monitoring the progress, watch your wheels. Again, this is a highly debated topic, but we prefer to keep our wheels on the ground. You may need to add more leveling blocks or make other adjustments to avoid your wheels coming off the ground.
Open Slides
Once the auto-leveling is complete, you can open slides and set up your campsite. If obstacles are close to your site, you’ll want someone to stand outside and watch as they open. As we mentioned, opening one of your slides into any object can cause severe damage. It’s not how you want to start your trip.
You may need to level again after a few days. This is especially true if you’re parking on non-paved surfaces. The ground will settle under the incredible weight of your camper. You’re generally fine with leaving your slides open to make these minor adjustments. If you’re worried, bring them in. It’s better to be safe than sorry.
Auto Level Your RV Like a Pro
Using the auto-level function on your RV can be challenging at first. However, the more you can do it, the easier it will come. Before you know it, you’ll be a pro at leveling and experience fewer challenges. Unfortunately, some campsites can be difficult for even the most experienced in the community. It’s all a part of the adventure!
Last update on 2025-01-19 / Affiliate links / Images from Amazon Product Advertising API